Light Meter
is quite simply a device that measures the intensity of light. A photographic equipment that helps the photographer or the camera know a desired exposure for an image.
Theory
Your camera does some math and finds out what settings to use while clicking a picture. Today camera software is powered by AI and Machine learning and the sensors are quite advance to get a good picture no matter what the situation may be.
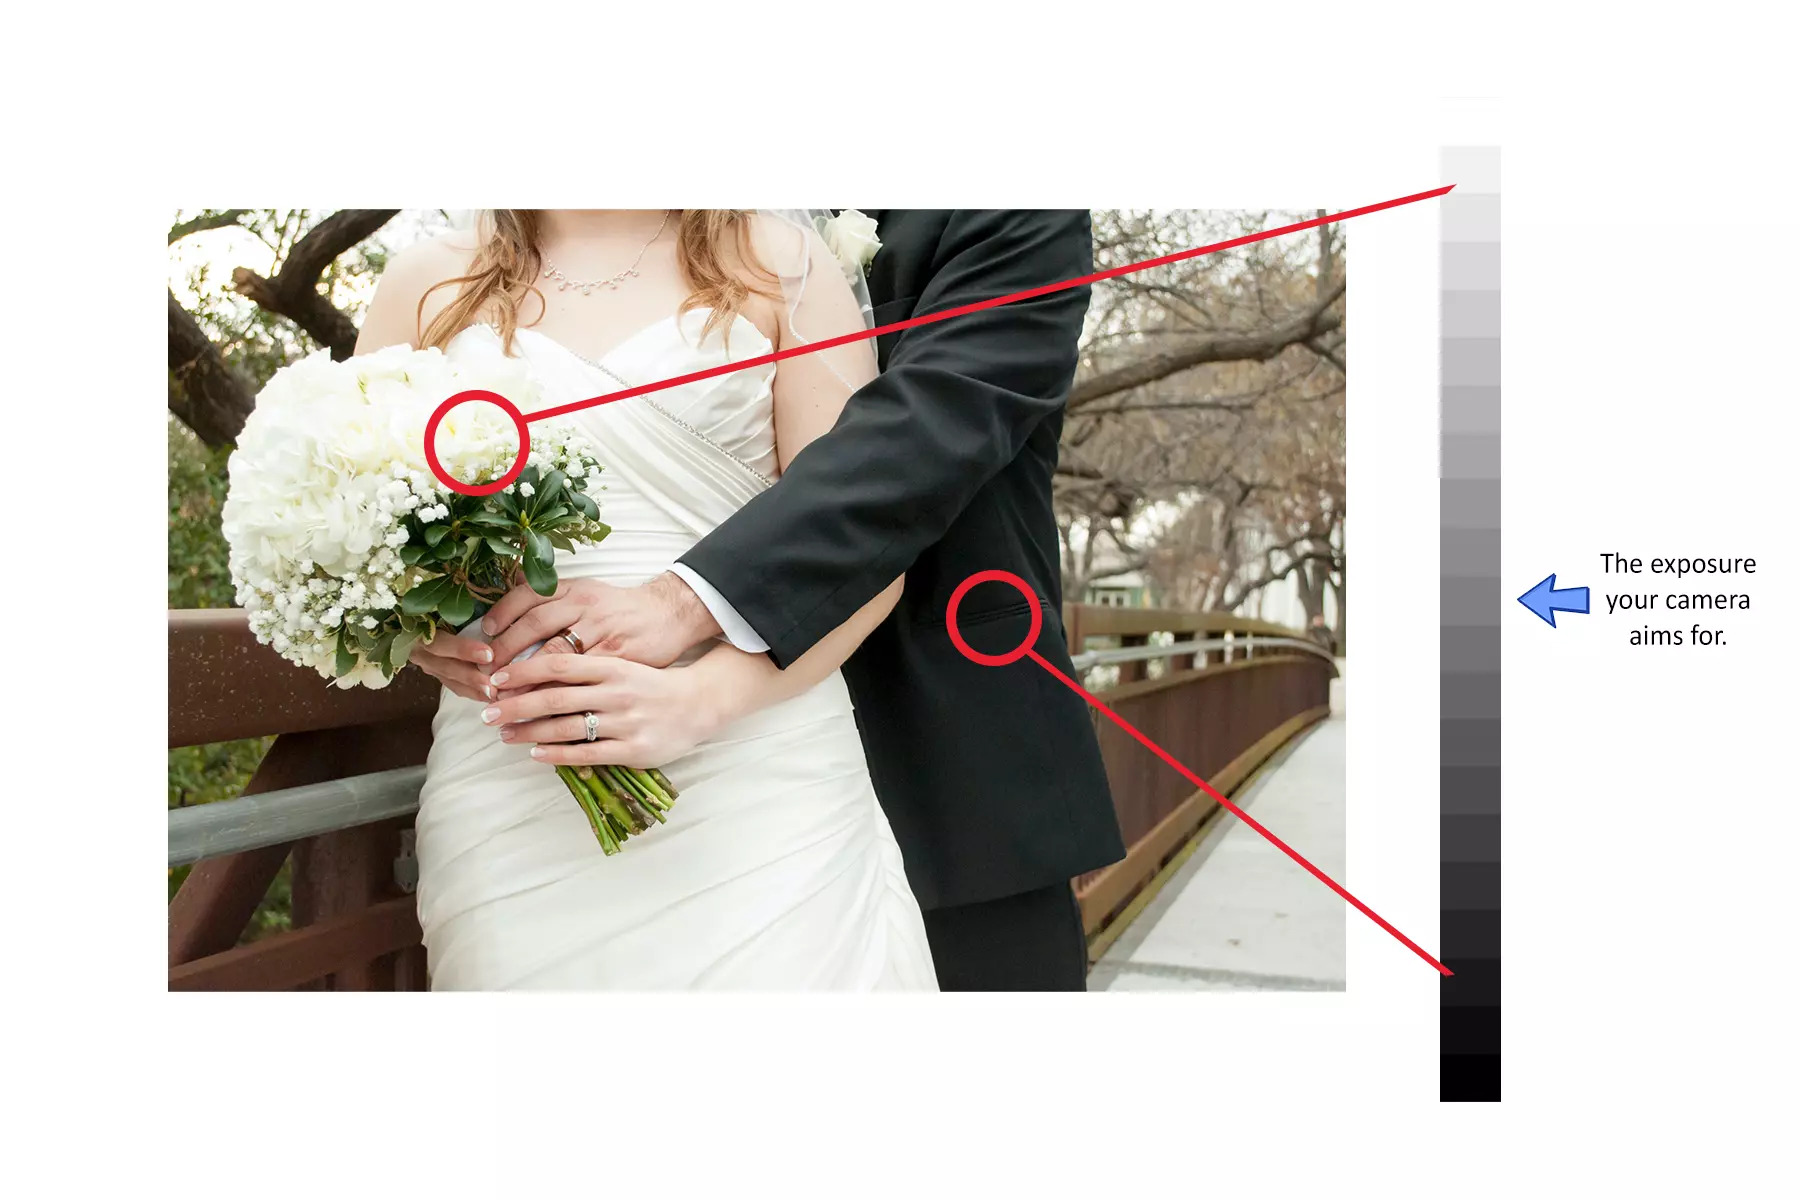
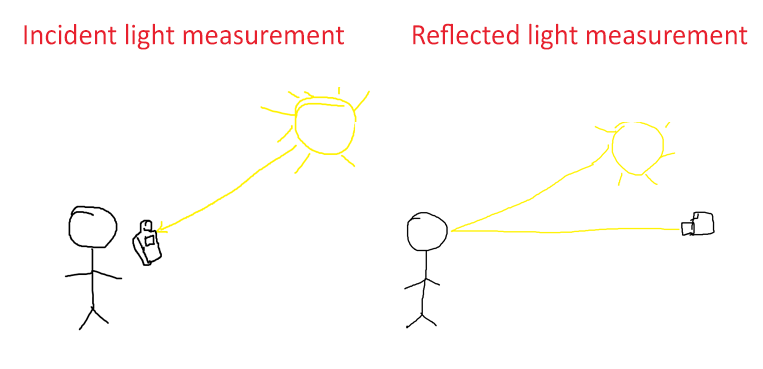
While cameras measure reflected light and compare it to a grey chart and determine what the image exposure should be like. The camera's light meter is quite easily tricked. If the light meter is pointing towards a black suite it will try to over expose the image till it gets a middle grey value, and on the contrary if its pointing towards a white dress it will try to under expose.
A hand-held light meter (incident light meter) solves this by measuring the light falling on the subject rather than the light being reflecting off of them. It measured the value and lets you dial in the camera settings you want to use for that picture.
Today one could say that this equipment is not that useful as we could check the picture we have taken and adjust whatever seems to be wrong with it, but it would be an indispensable tool for someone doing film photography, as they would be only able to see the results once the film is processed and they might not get another chance to photograph that seen.
Why make one?
I want to.
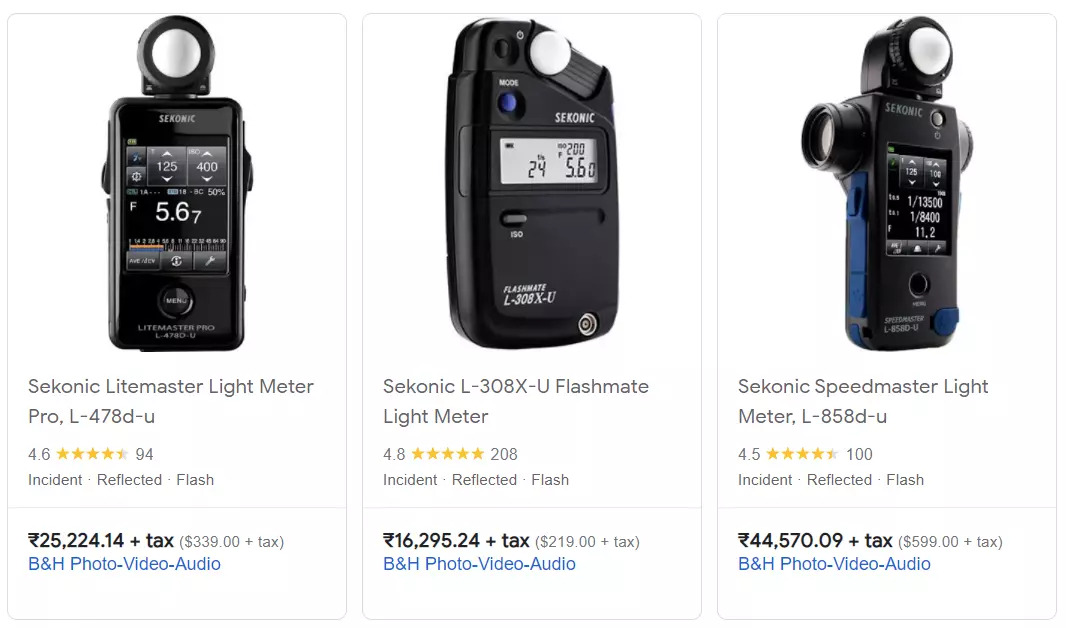
And looking at the prices of existing products it was quite clear buying one is not a good option.
I looked into the things required for to make a light meter and here is a bill of materials.
| Component | Price in rupees | USD |
|---|---|---|
| Light Sensor (BH1750) | 229 | 3 |
| Arduino Pro Mini | 389 | 5.23 |
| LI-ION Cell | 349 | 4.69 |
| Charging Module (TP-4056) | 59 | 0.79 |
| Display | 350 | 4.70 |
| PLA | ~200 | 2.69 |
| Misc. | ~200 | 2.69 |
Total: 1,776 Rupees or 24 USD.
I almost immediately got the breadboard prototype working, I started to code the user interface and the measuring functions but I scrapped that after finding this gem, a much better version of what I was attempting available as open-source code.
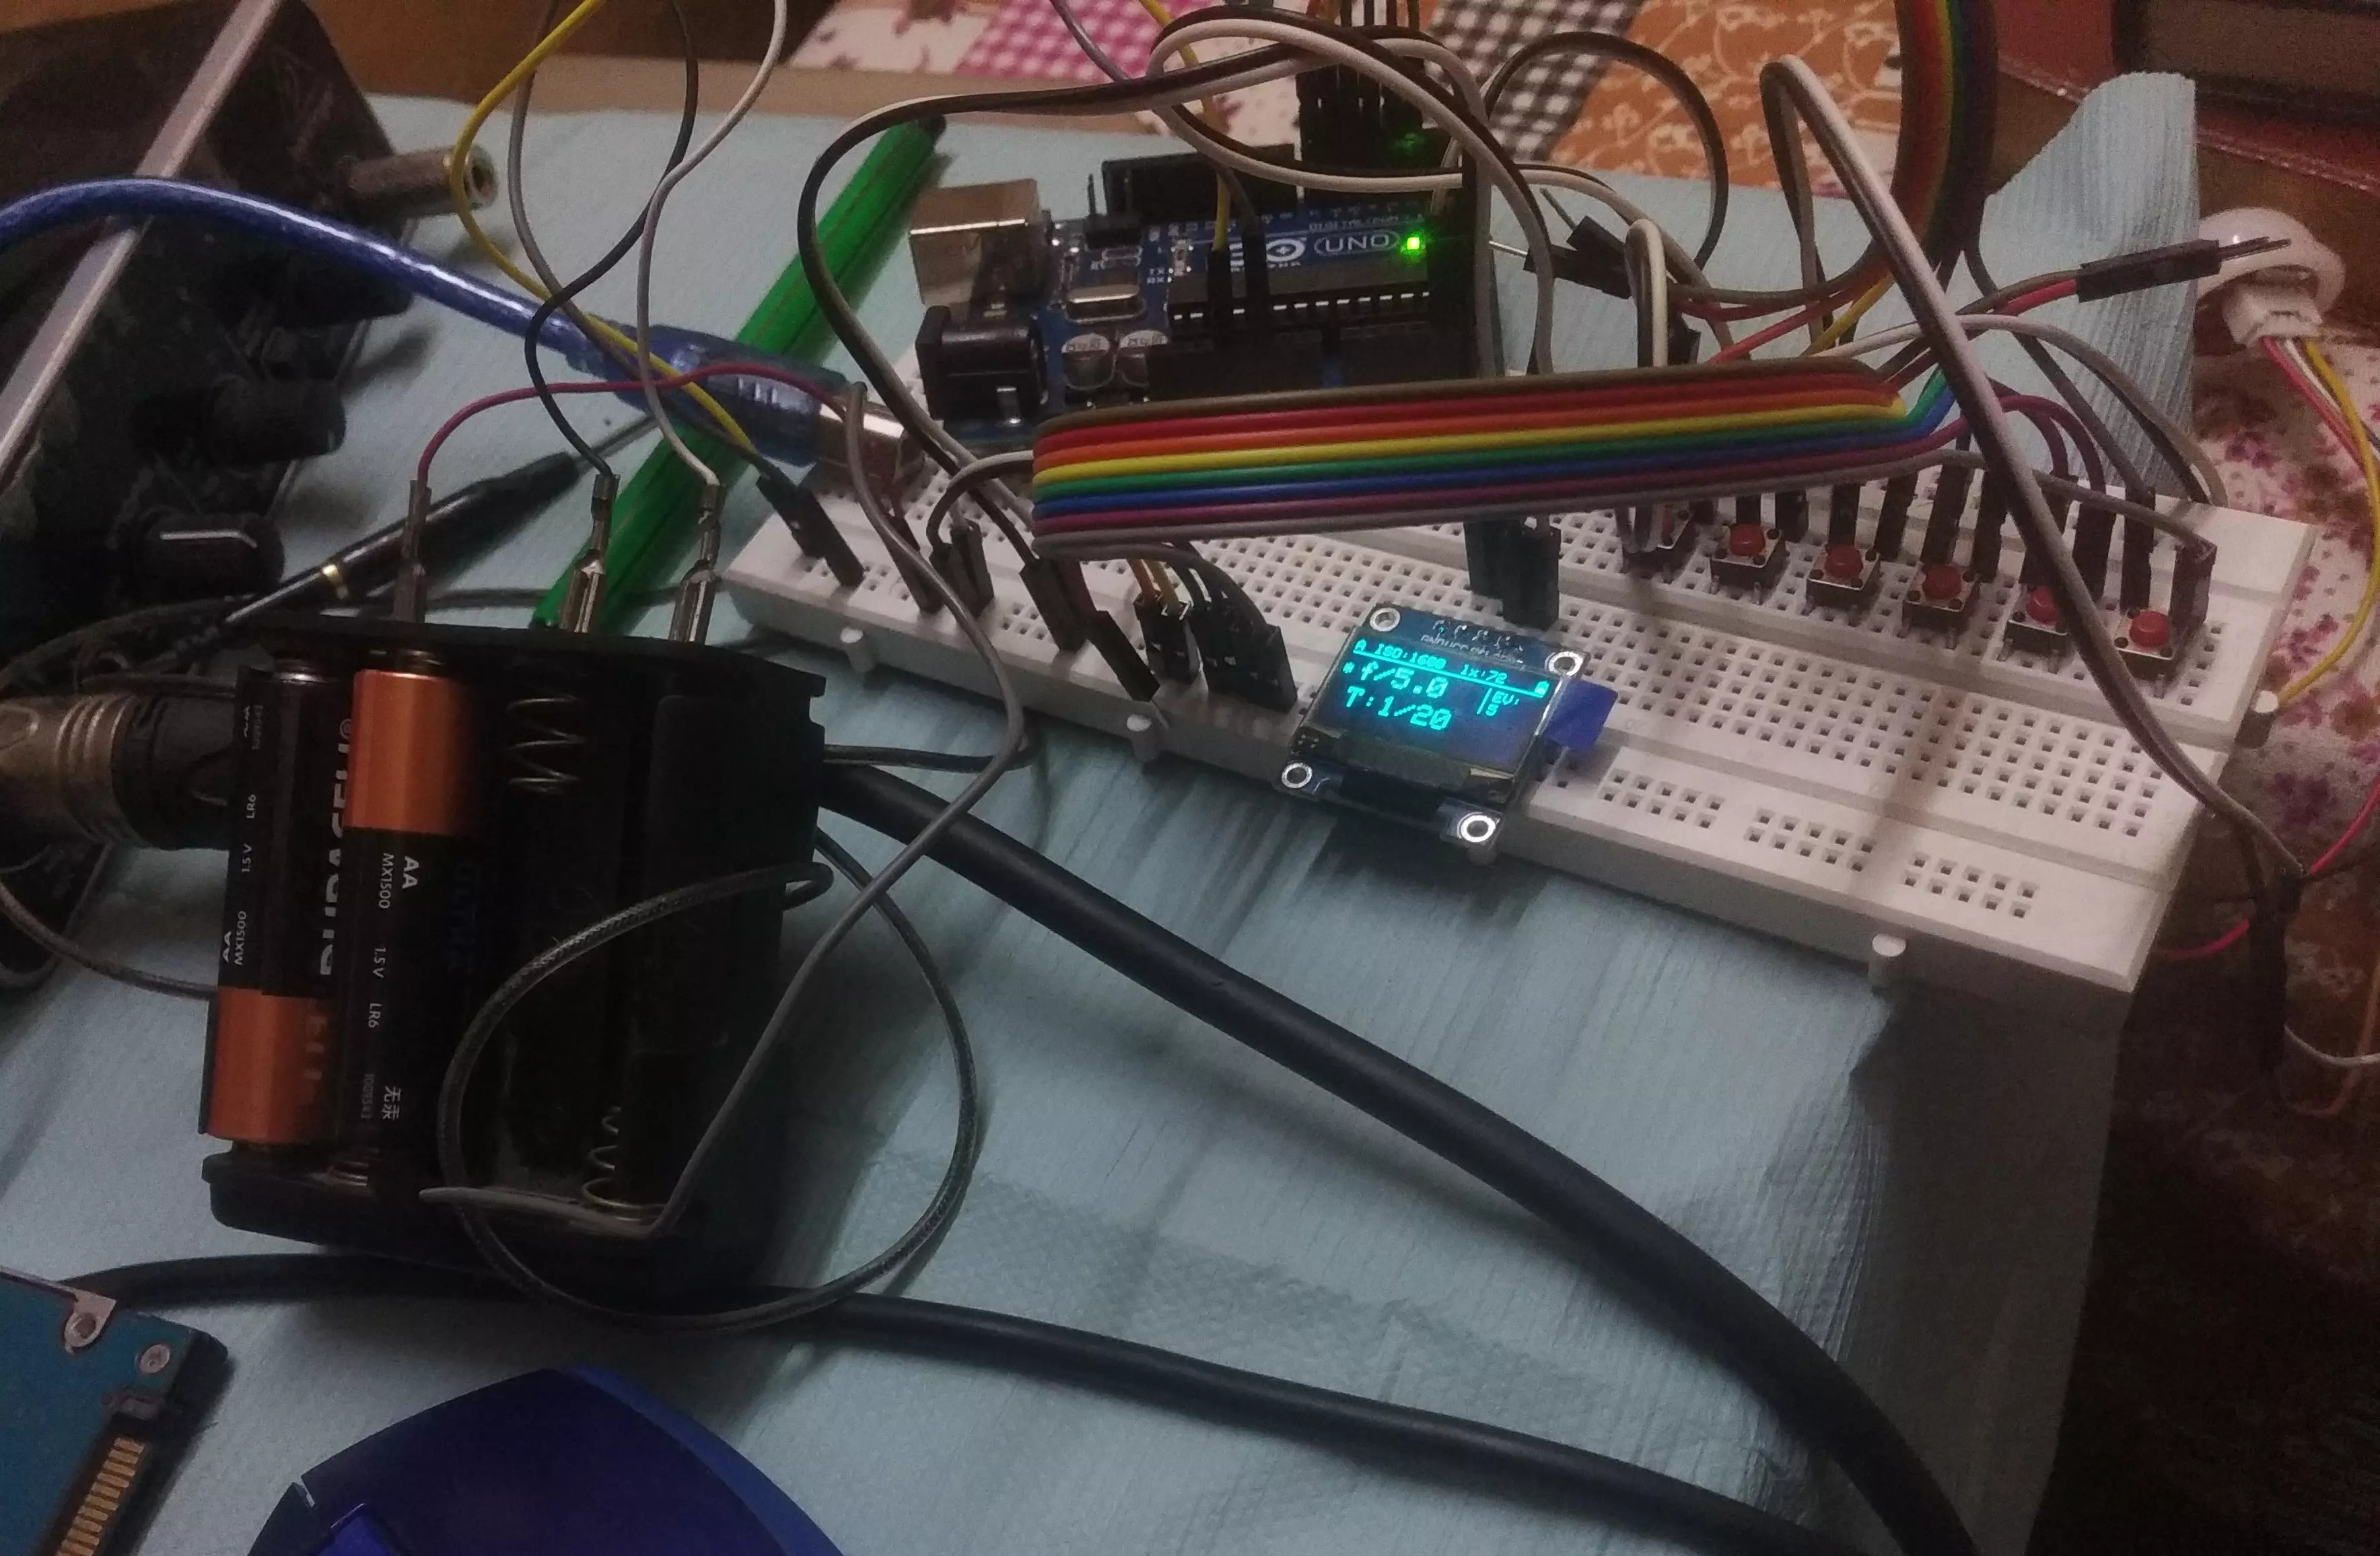
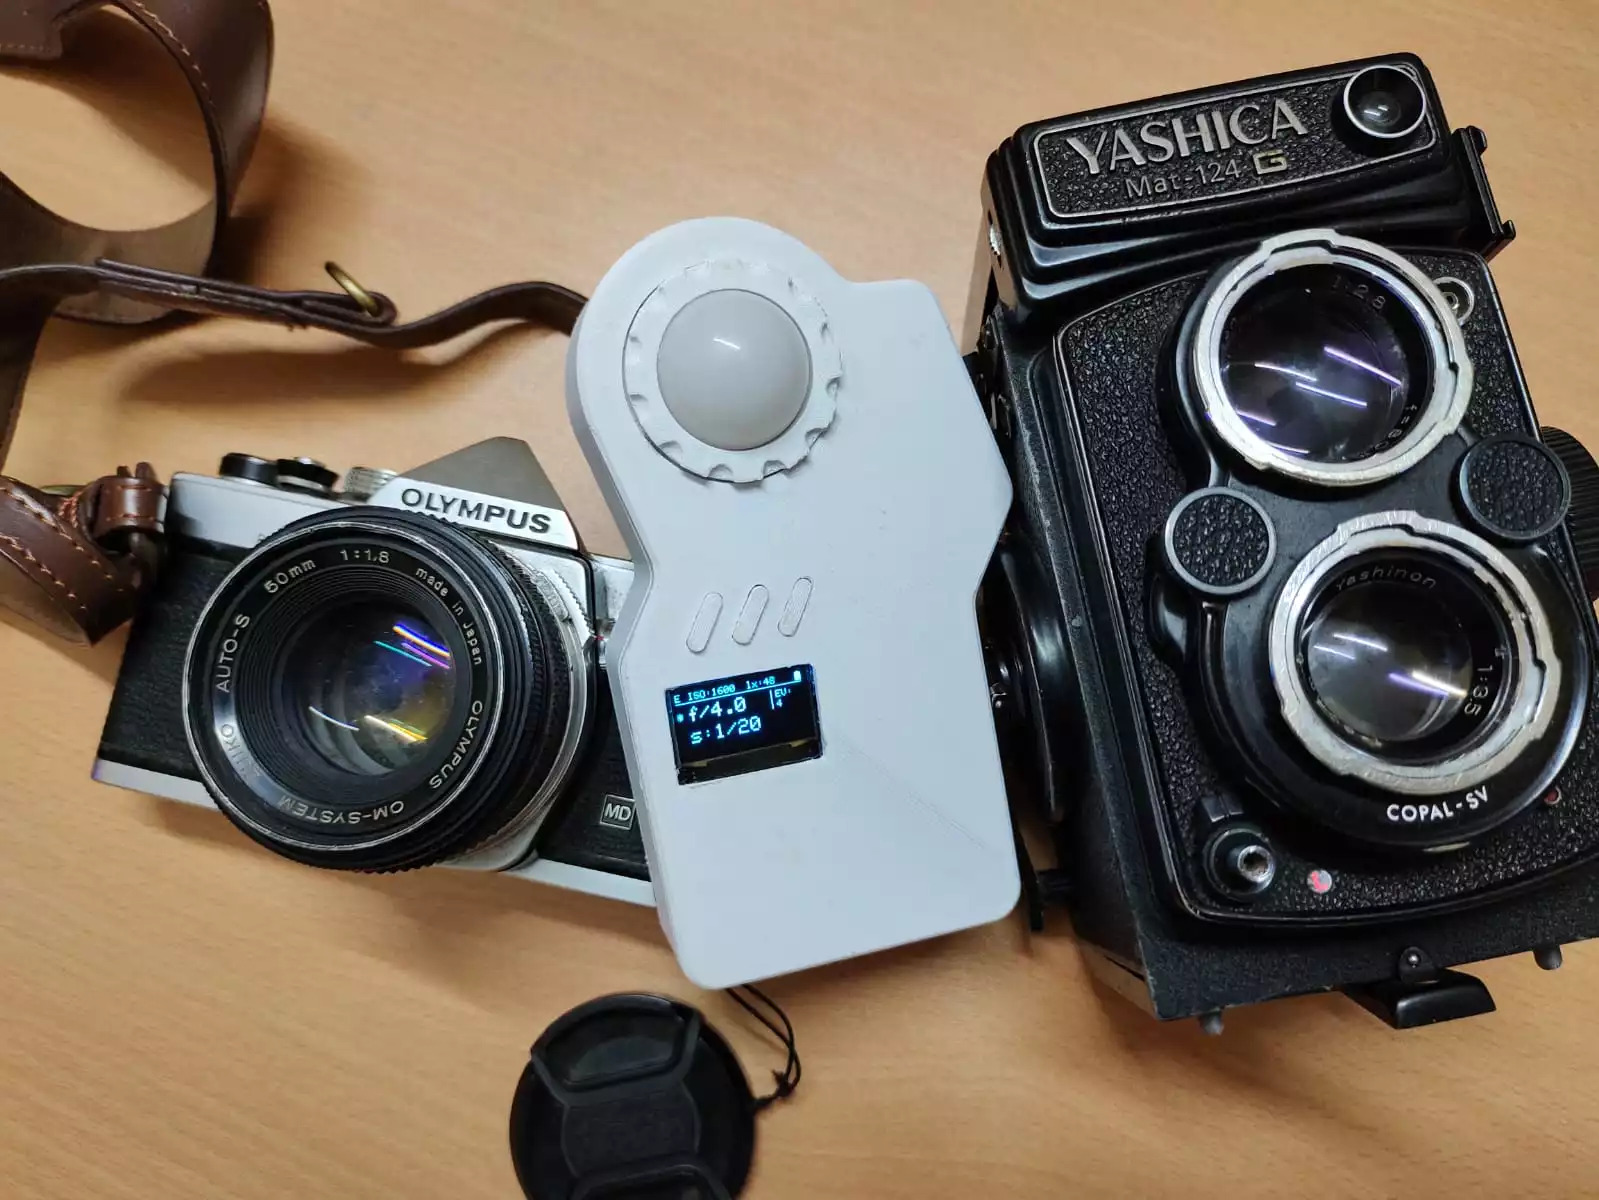
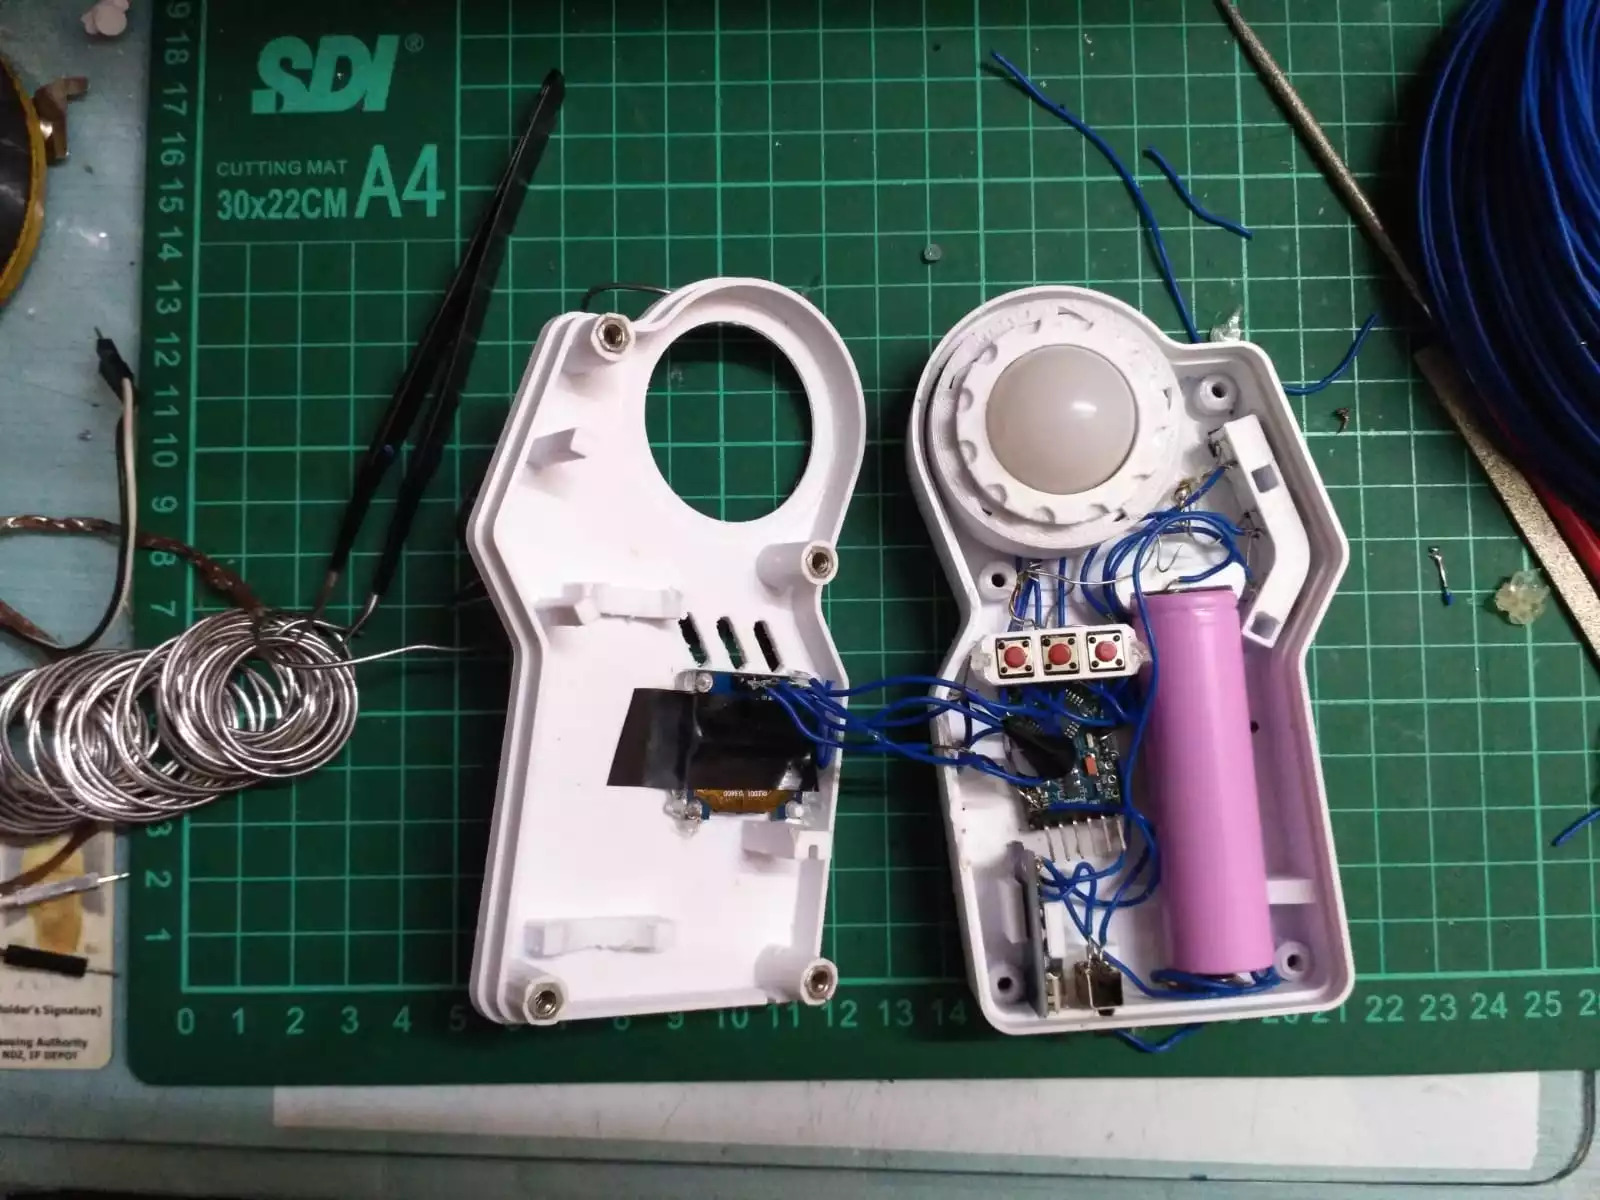
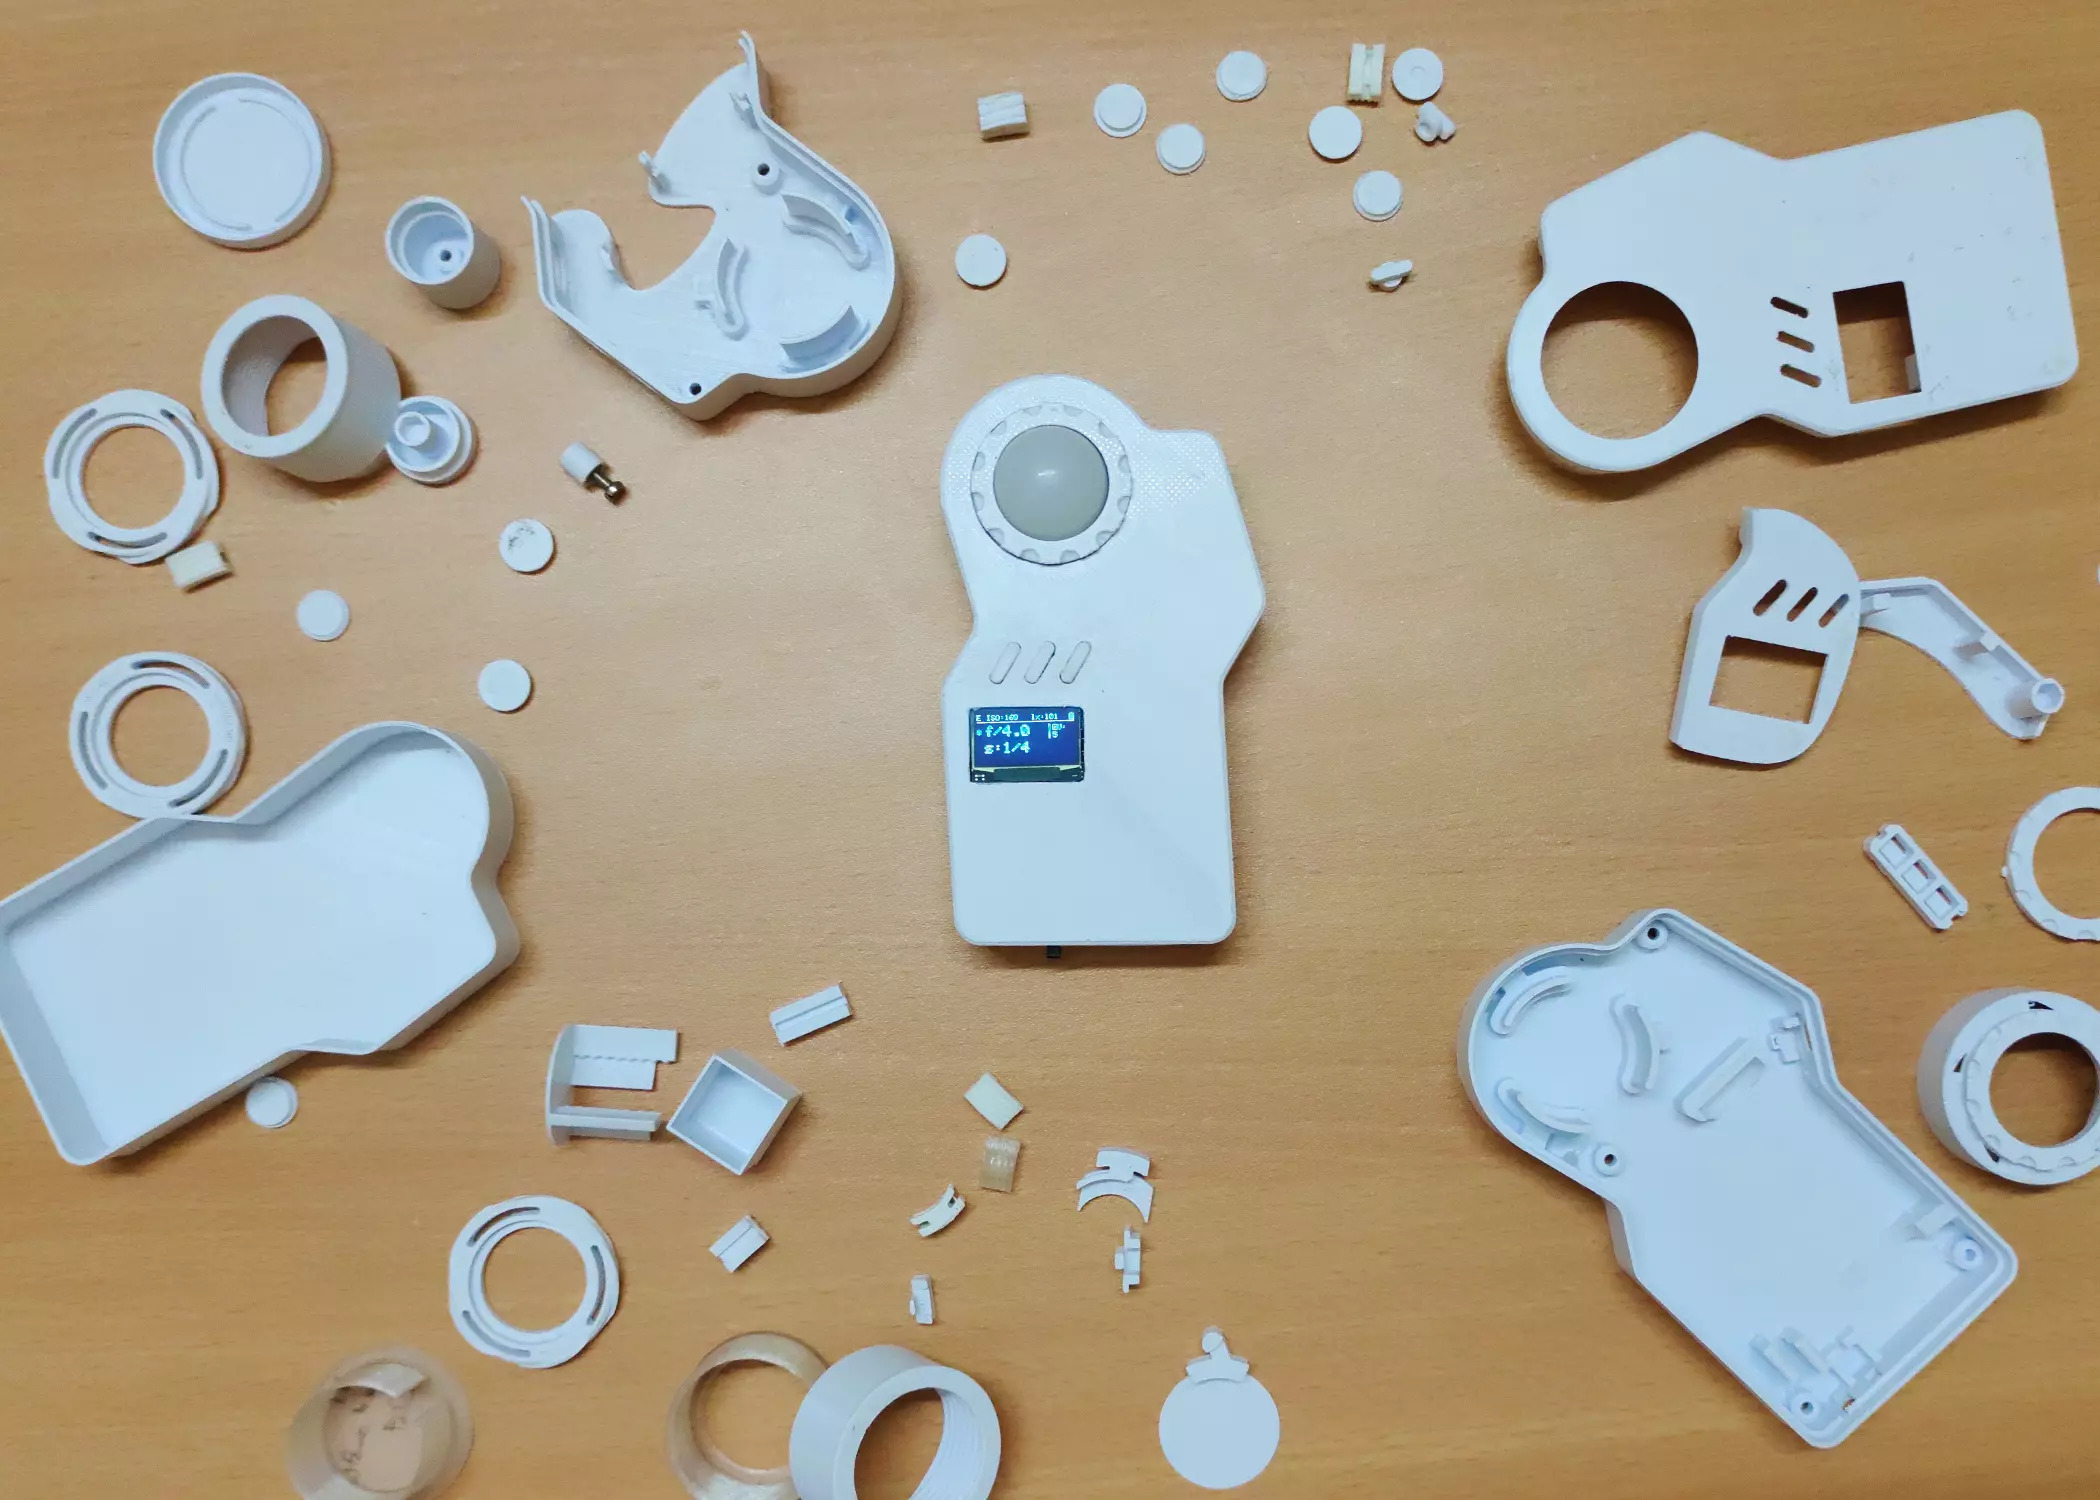
Now all that was left was to make this look more a product. This prototype sat in a box for almost a month till I got access to a 3D printer. I immediately started sketching a design that would hold all the electronic components.
Challenges
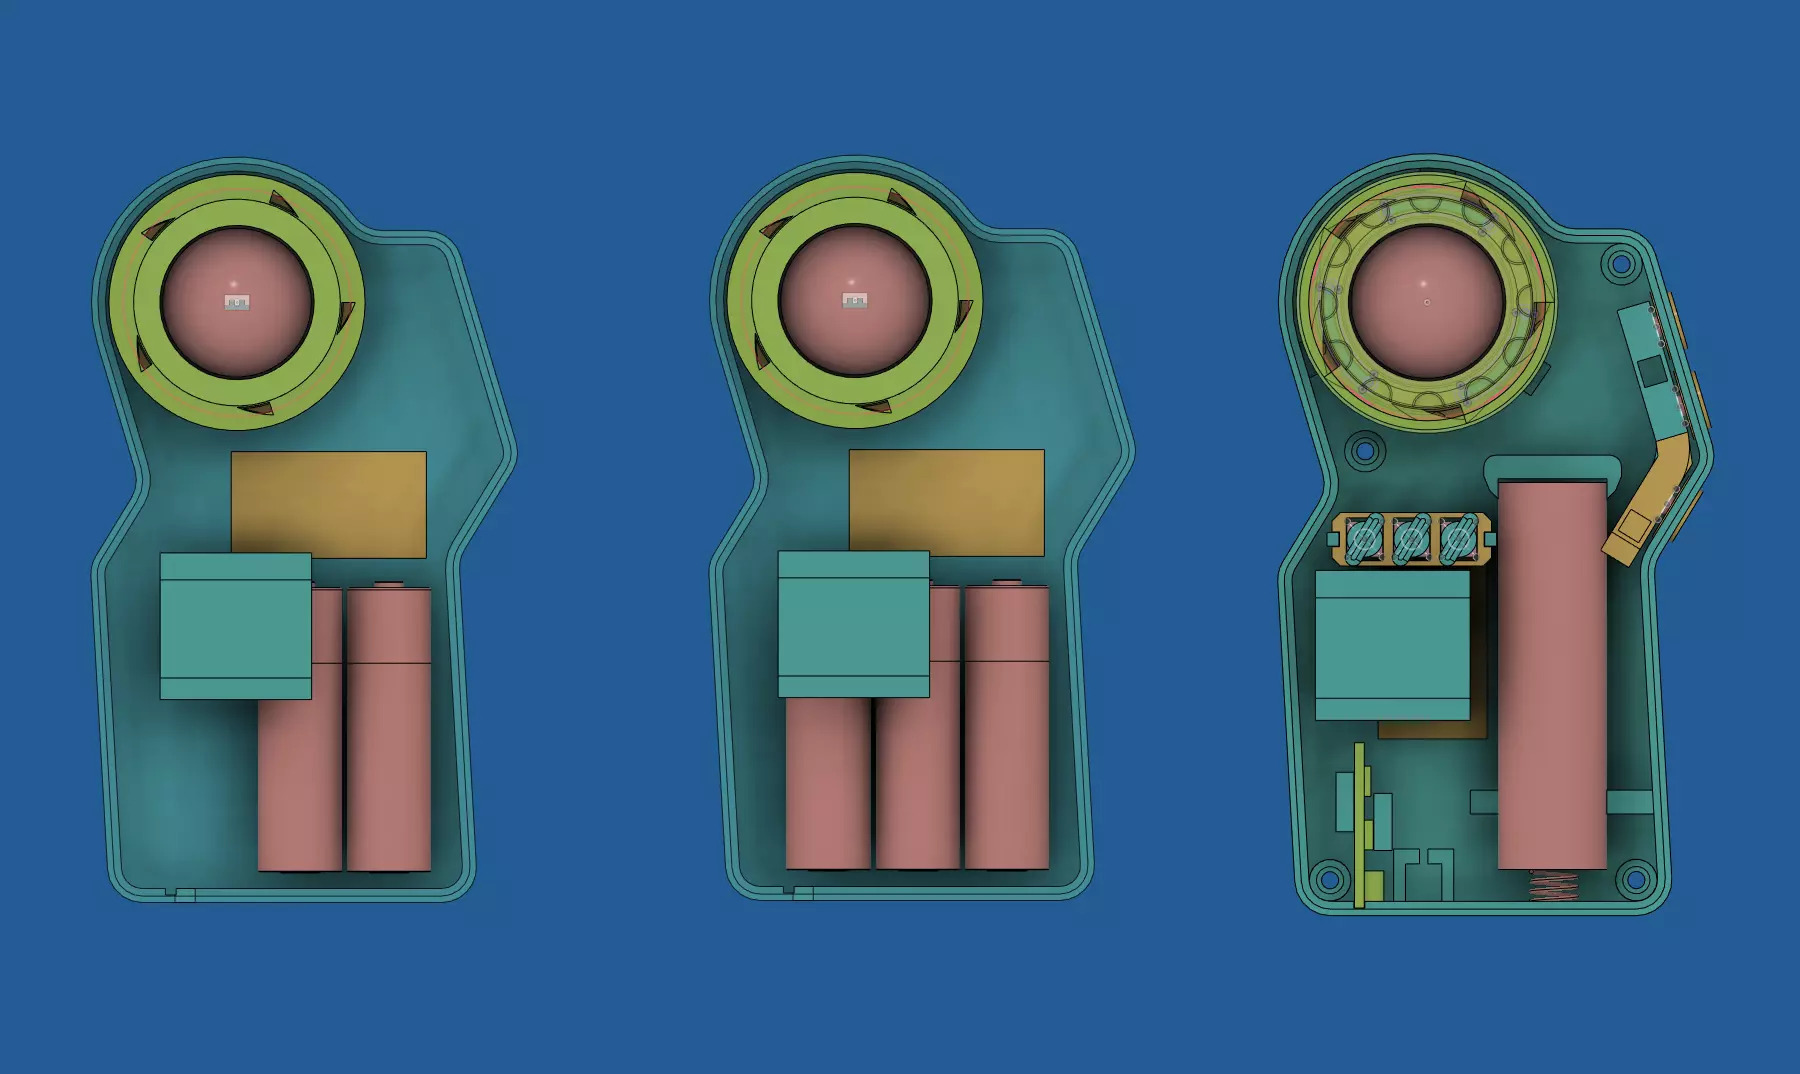
Power Supply
- While it could theoretically run on 2 AA batteries, I imagen the battery life to be not as good. As first the Arduino runs on 5v or 3.3v and providing just 3v would be demanding a lot form the circuit.
- Designing an enclosure big enough for 3 AA batteries was not quite possible as it would increase the size and weight of the final product.
- If there is a removable battery, there are more movable parts that snap fir together or something which adds more complexity to a design and could also make the design more fragile.
- Settled on a LI-ION cell (3.7v) and a charging IC-TP-4056. Now the battery is not removable but could be charged with a USB-C cable.
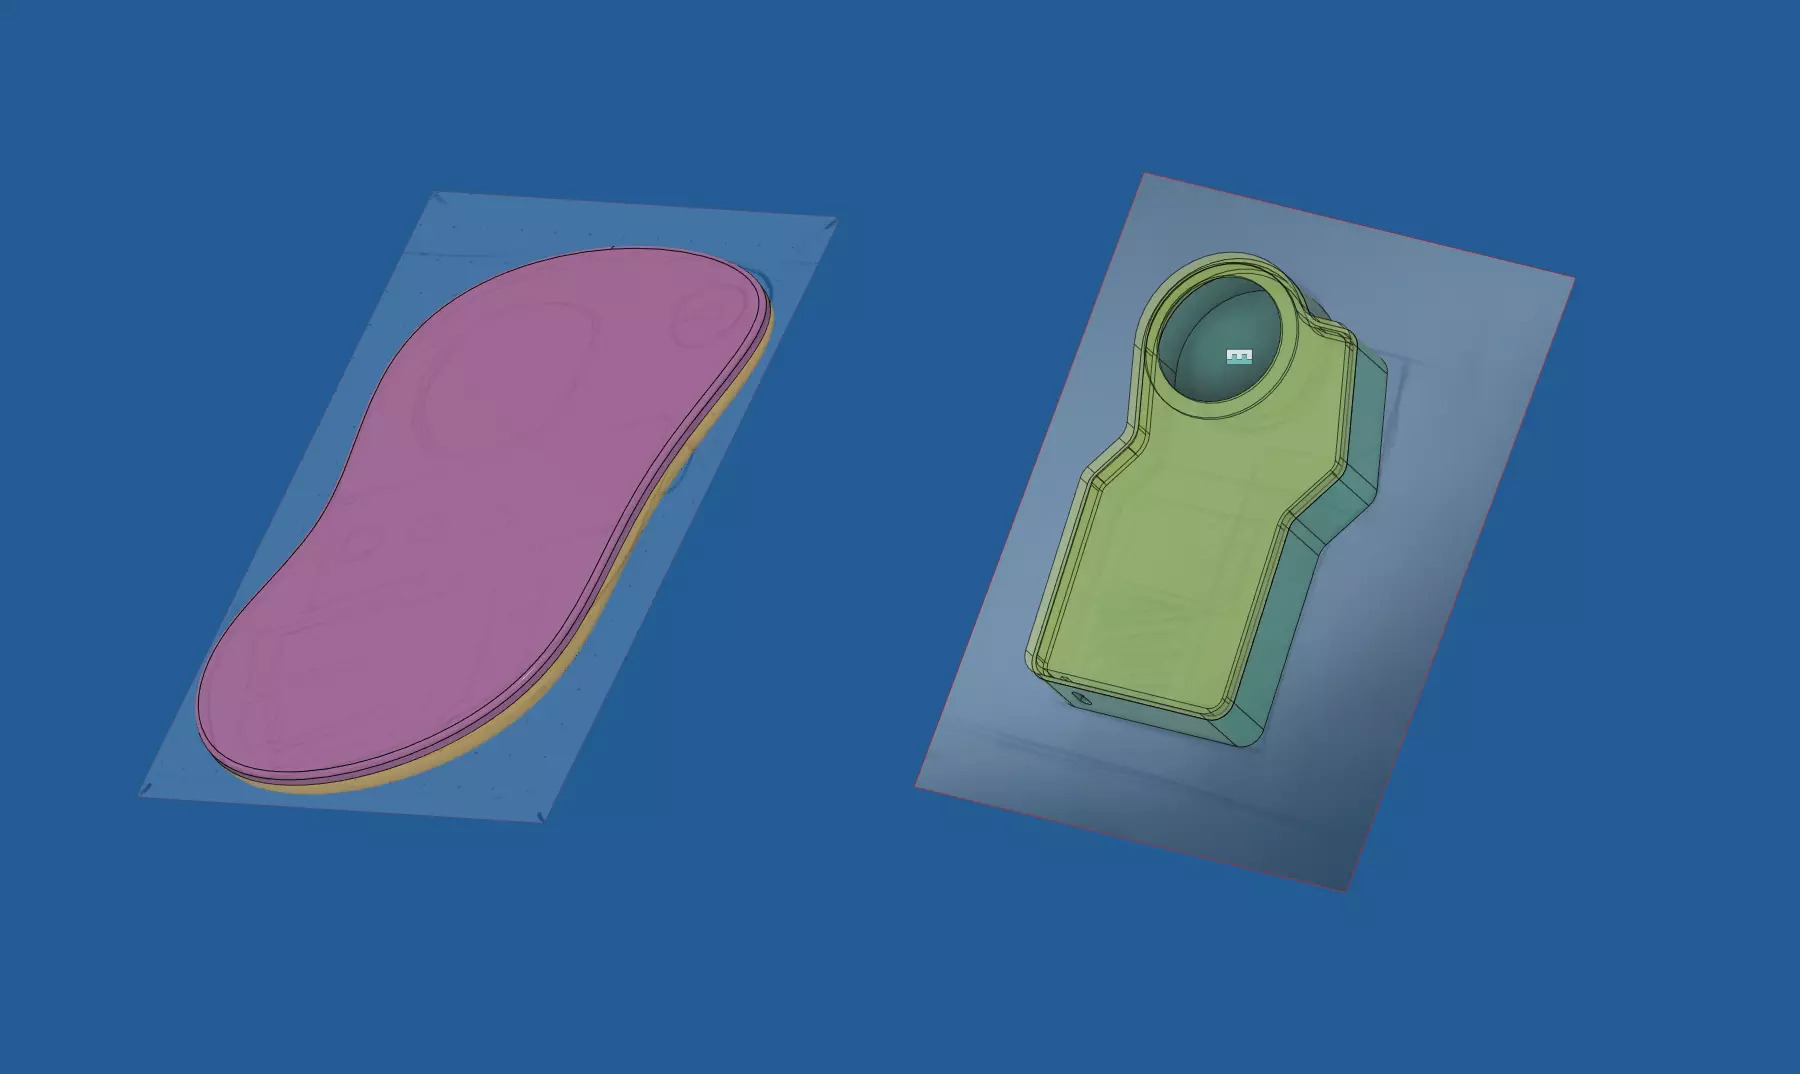
Shape
- There are certain restrictions to the shape you are able to make when you are tied down to one manufacturing process.
- 3D printers are not actually 3D its more like 2.5D. As you have freedom on the X and Y axis but not truly on the Z.
- Supports: We have to design things with supports in mind as the nozzle of the printer cannot lay plastic on air hence many shapes are not possible and many complex shapes would be fighting with the limits of the 3D printer, or would have sub power surface finish.
Migrating to a different slicer software
Slicing software's are the ones which transform 3D geometry to machine code which the printer can perform.
Here is an example of a few places where Prusa Slicer fell short and I had to use Cura for my prints.
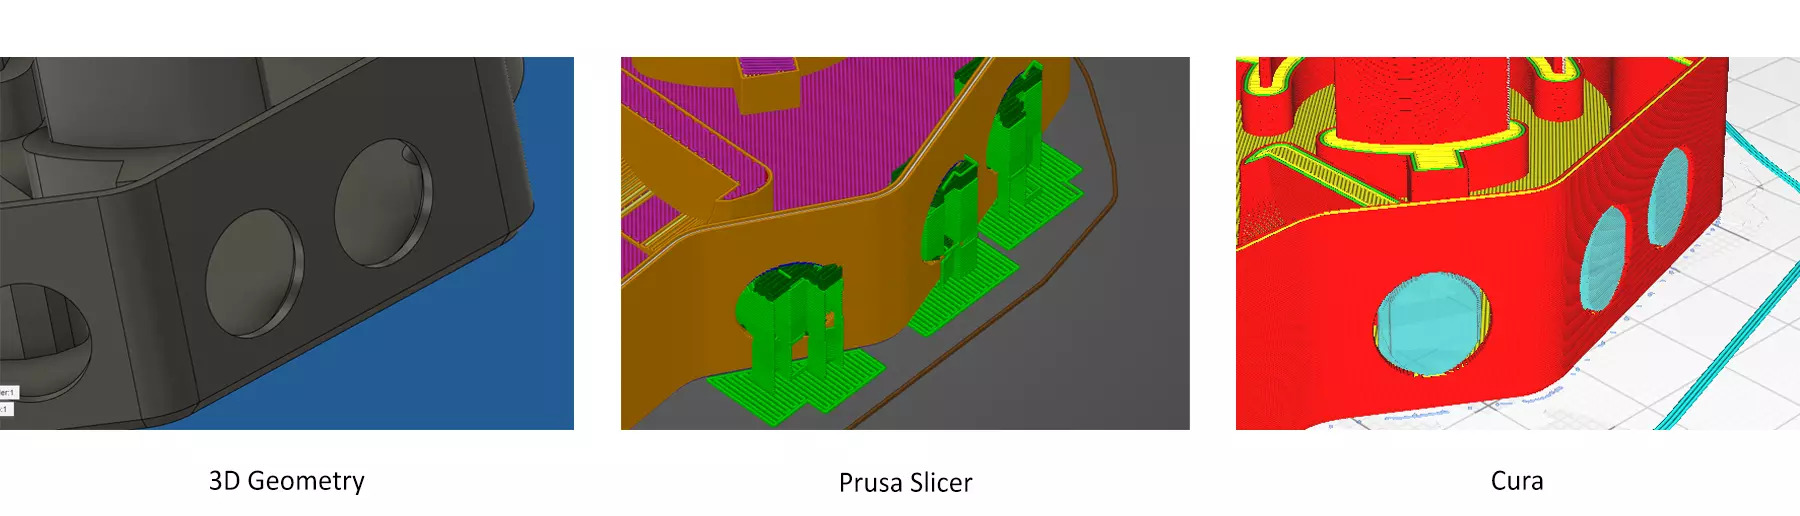
As you can see Cura's supports (Light blue) are much easier to remove and use less filament than Prusa slicer.
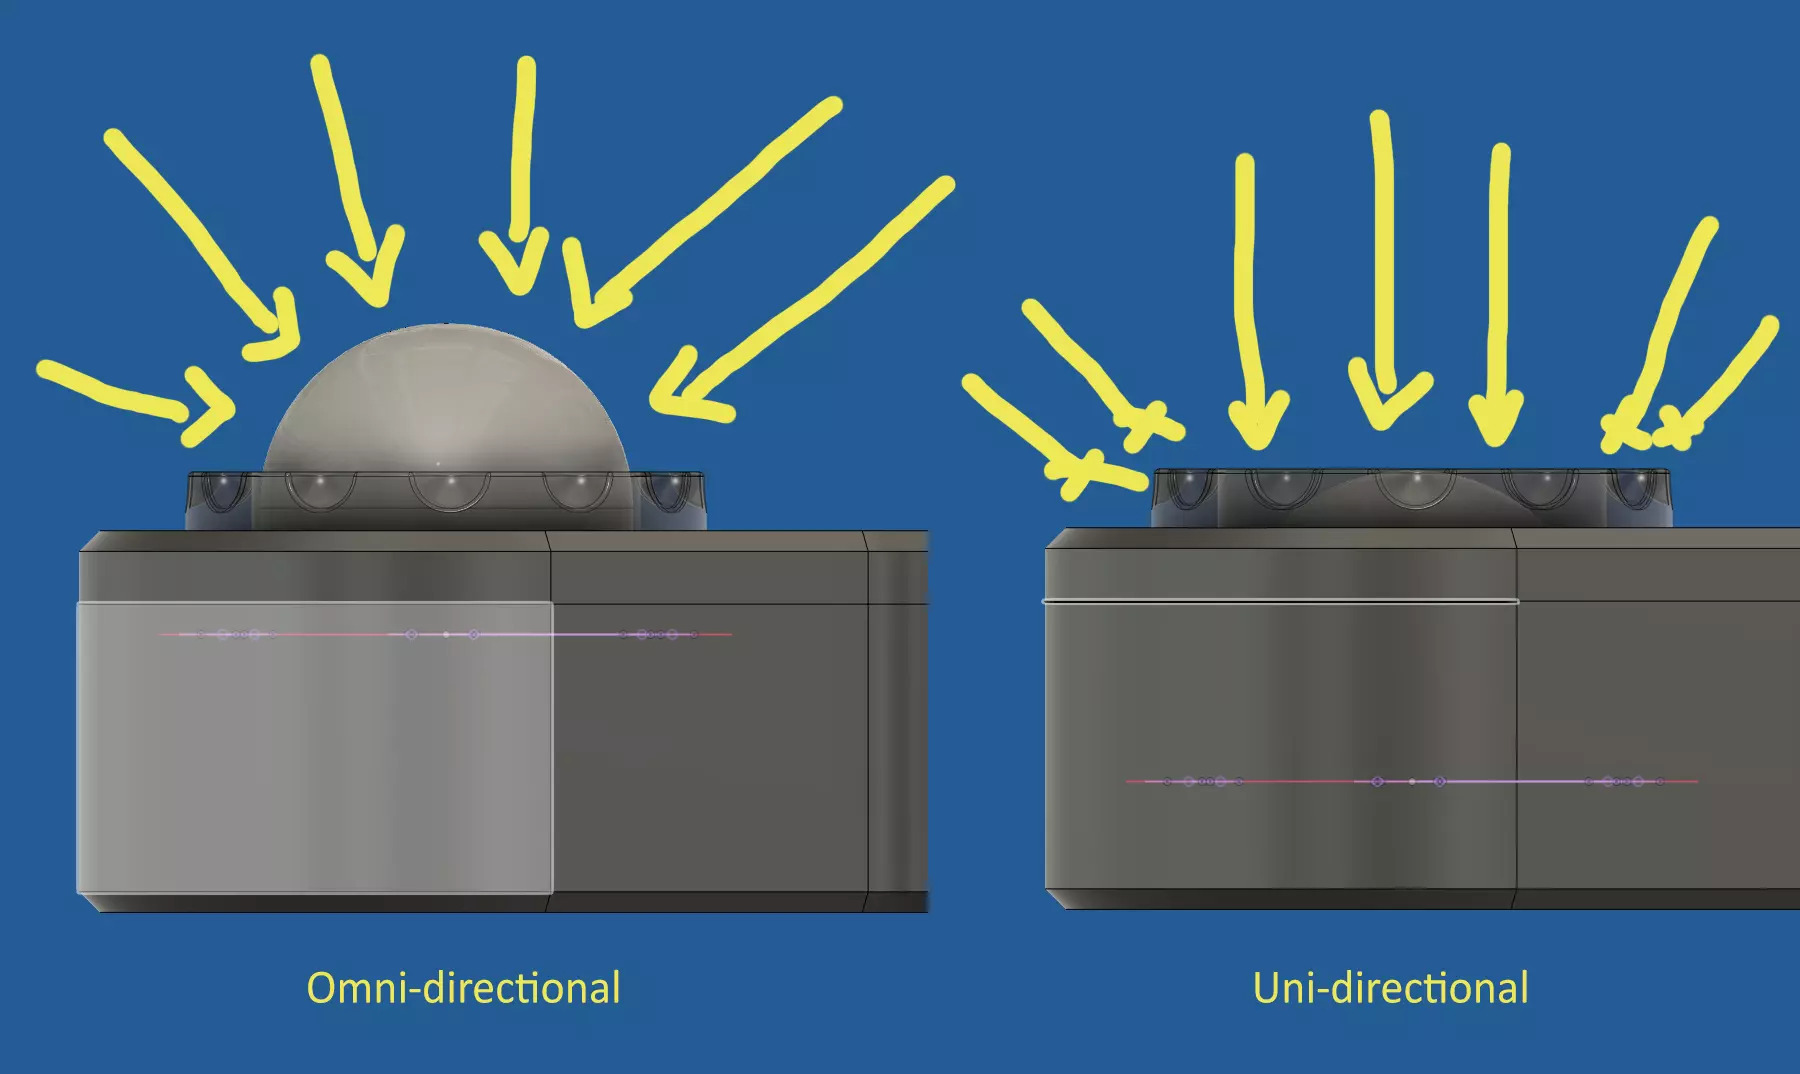
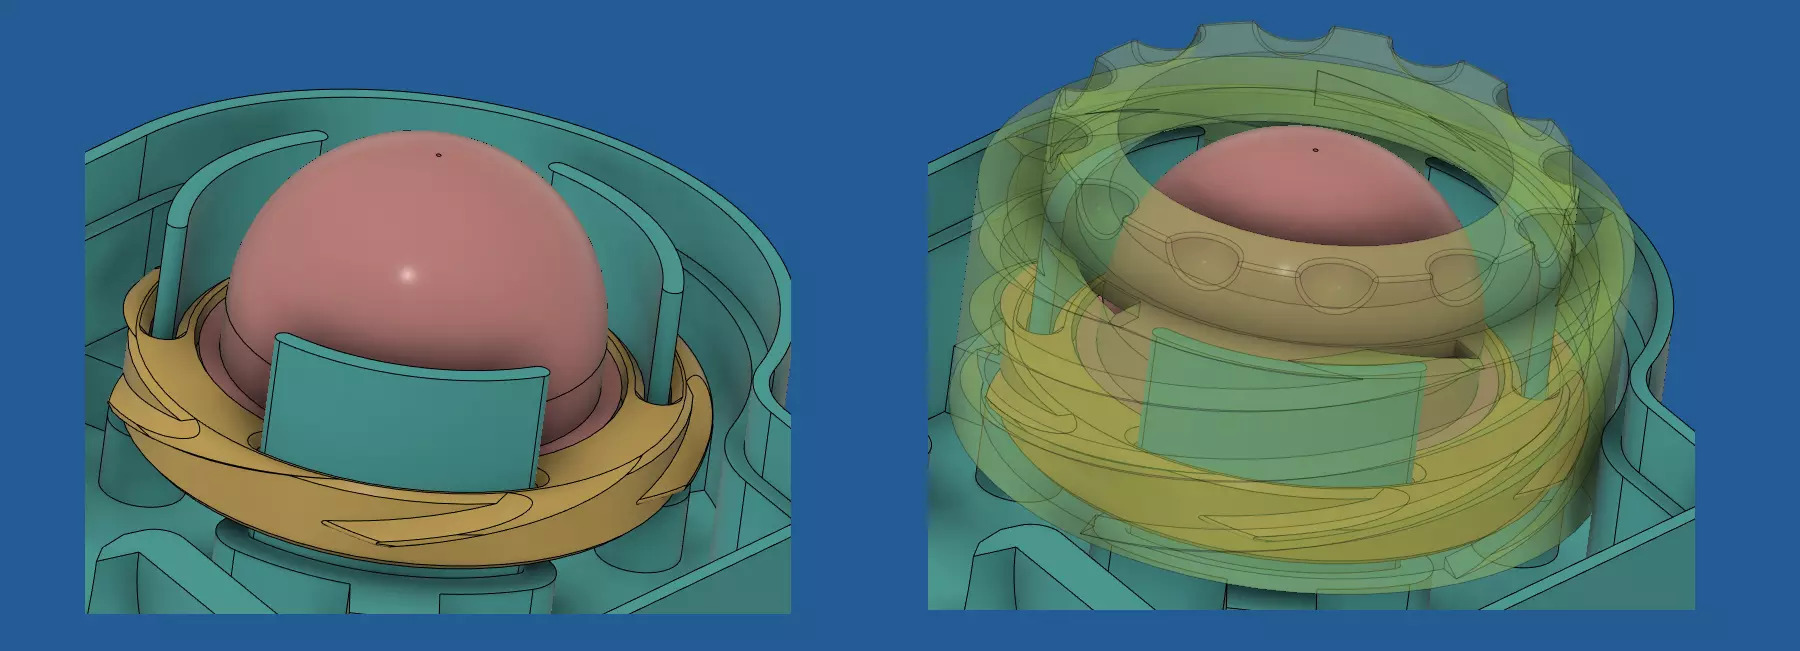
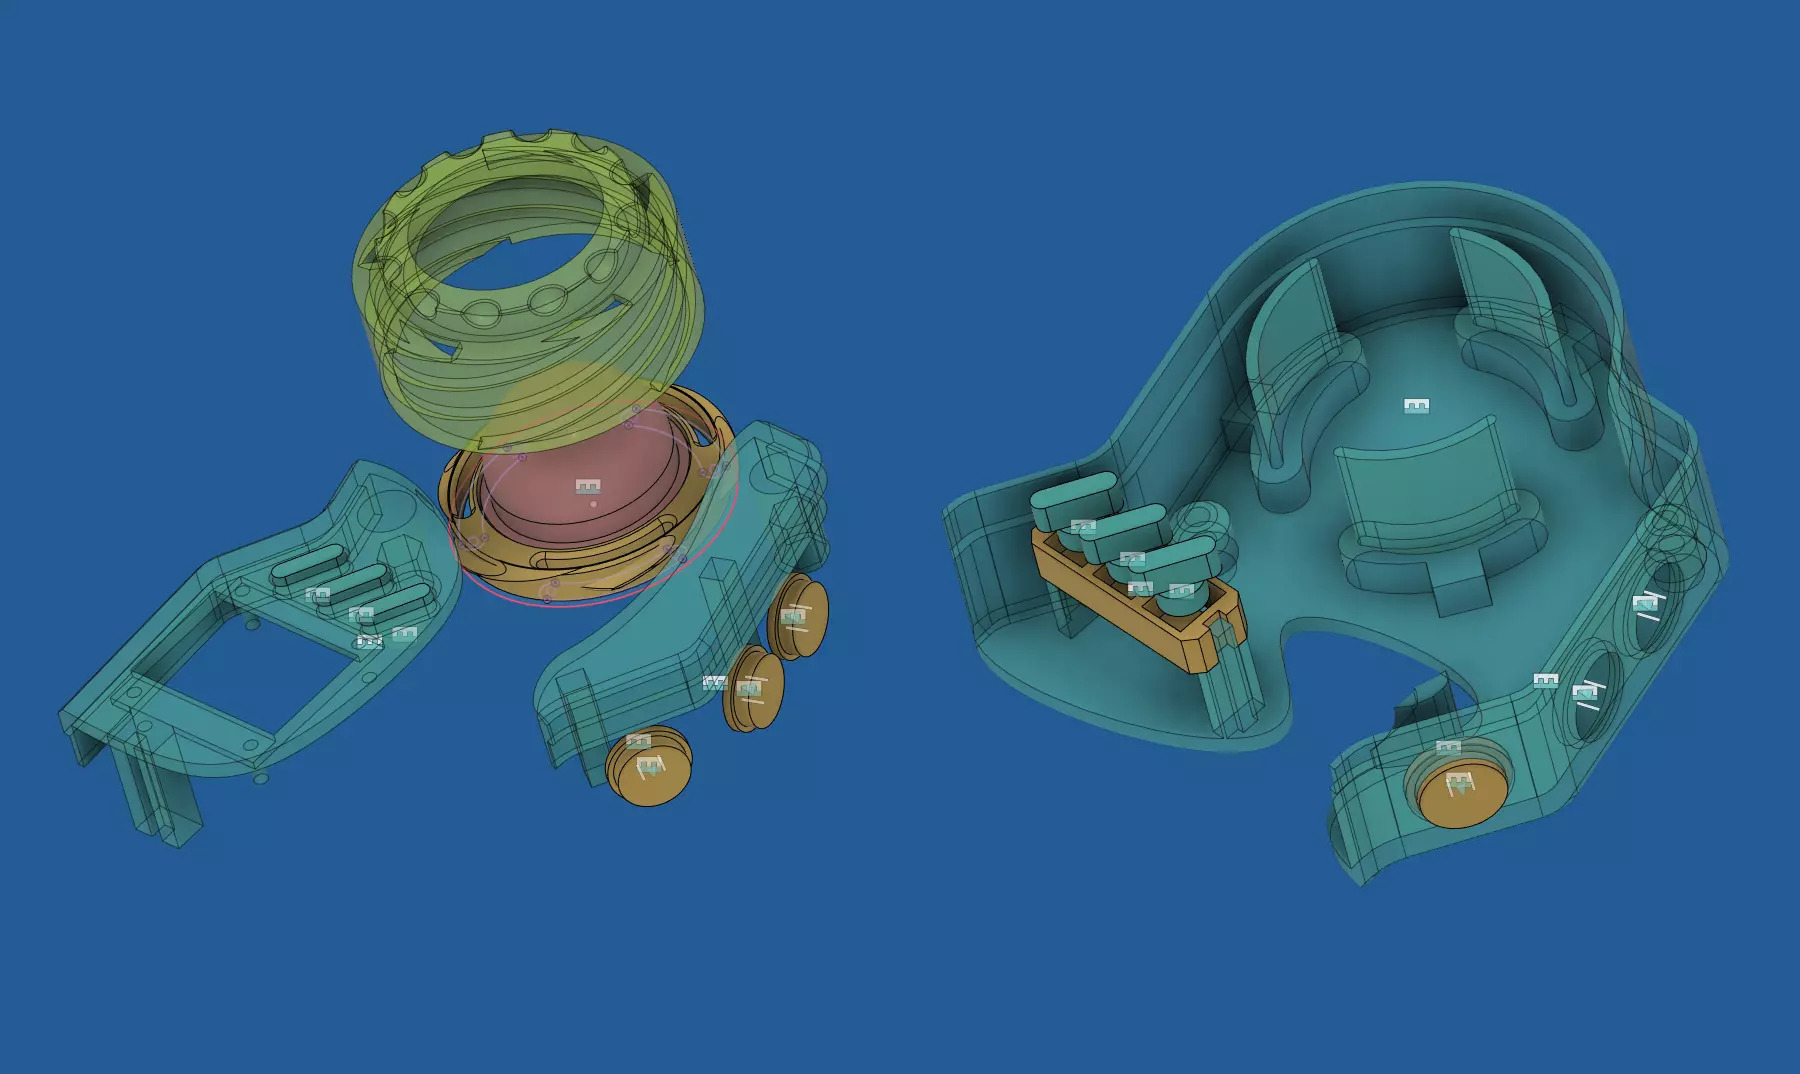
Dome Mechanism
The theory of this mechanism is simple, have the dome exposed to the environment to pick up ambient light, or let it be recessed in the body with just the top part exposed to pick up light from a particular source.
Attempts
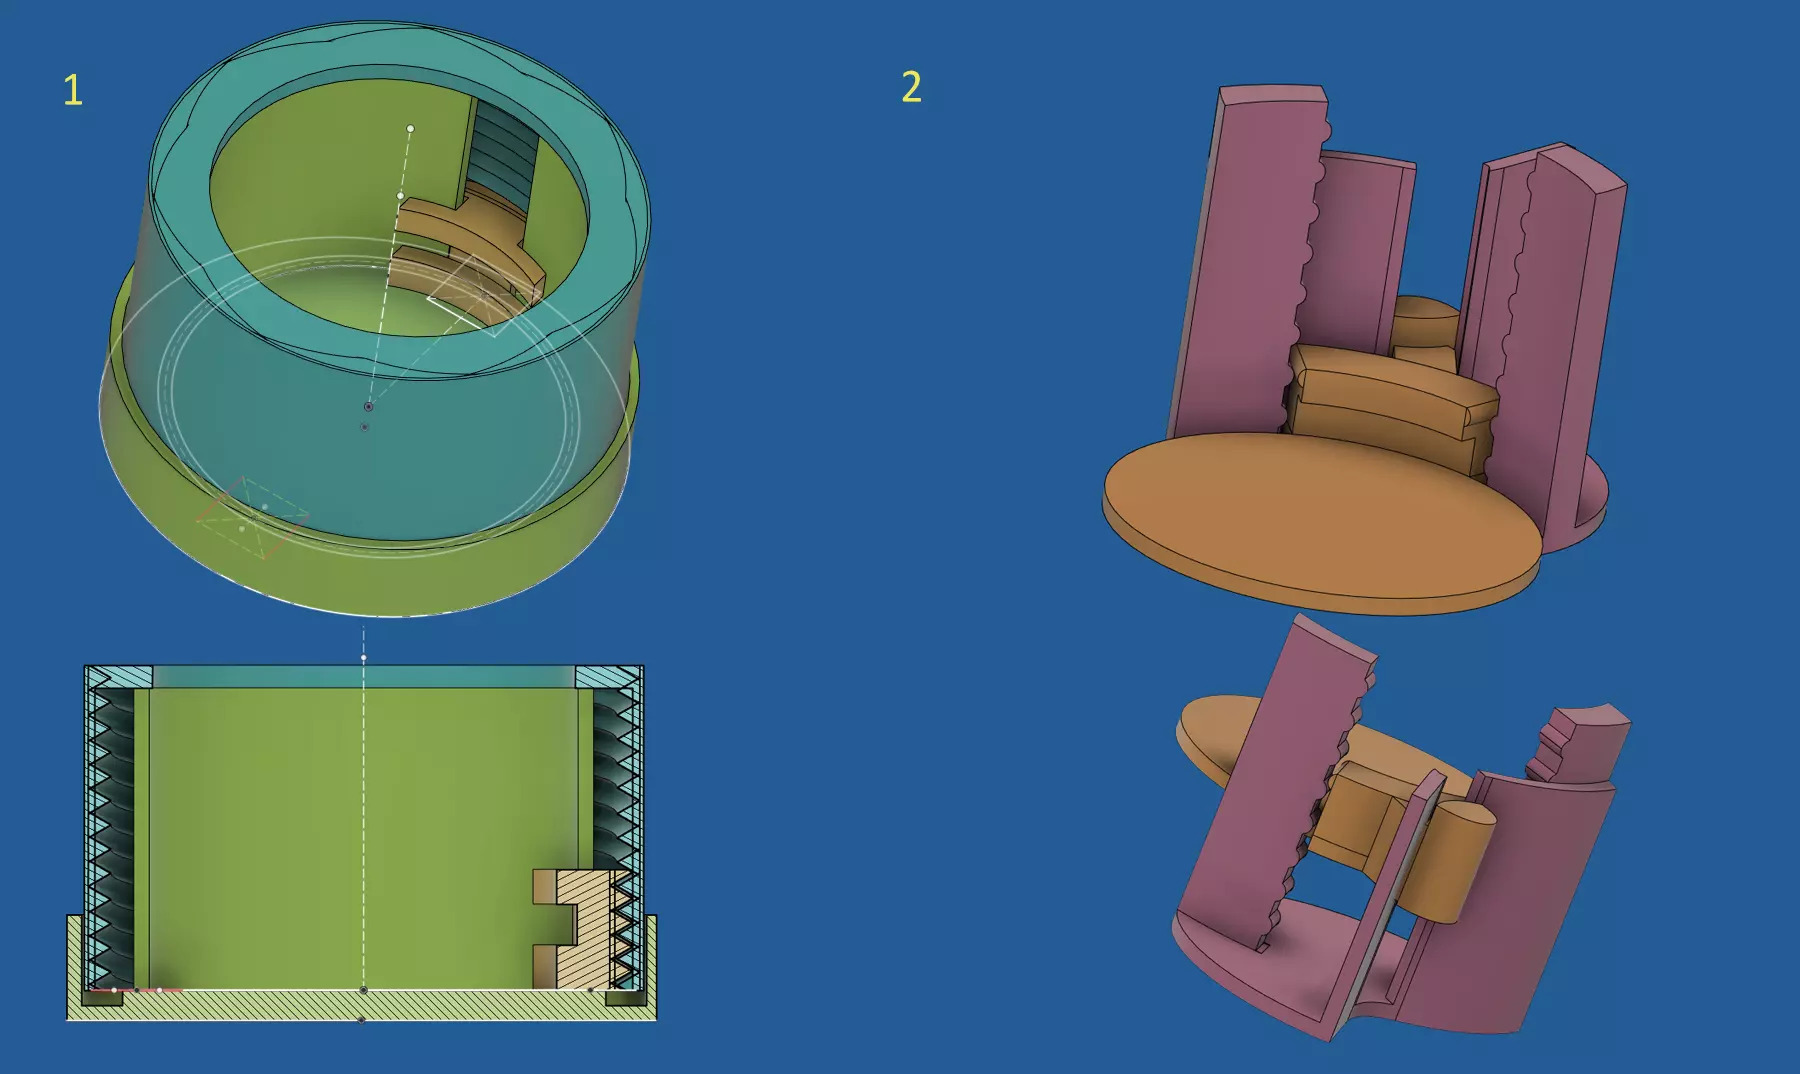
Final Version
Testing method
While 3D prints could be a few hours long, but you could significantly reduce the amount of time taken for a prototype by manually cutting the CAD model in order to save time and gain more information form the print while testing it with other components.
Wiring
Well this was not planned.
id like to hear what you thought about the project. Email: aksavio@gmail.com